 Cr
CrExplore. Research. Design. Create. Sell.
Real walkthroughs for every Cr3ation Factory tool — the exact buttons, in order, with screenshots. Read it here, or ask Alfred to walk you through any of it. Everyone learns differently; this covers all of you.
Press
Open /press →You walk away with a print-ready ebook PDF.
Press is the in-CF ebook studio. You write your book, structure the chapters, and export a real PDF without ever leaving for Canva, Reedsy, or Vellum.
Honest limits: V0 does writing, structure, and a clean PDF export. Rich typesetting, cover design, EPUB, and one-click store-listing are later passes — the tool never fakes them.
Open Press
Go to /press — or from your Desk or Academy toolkit, launch Press. Sign in if prompted.
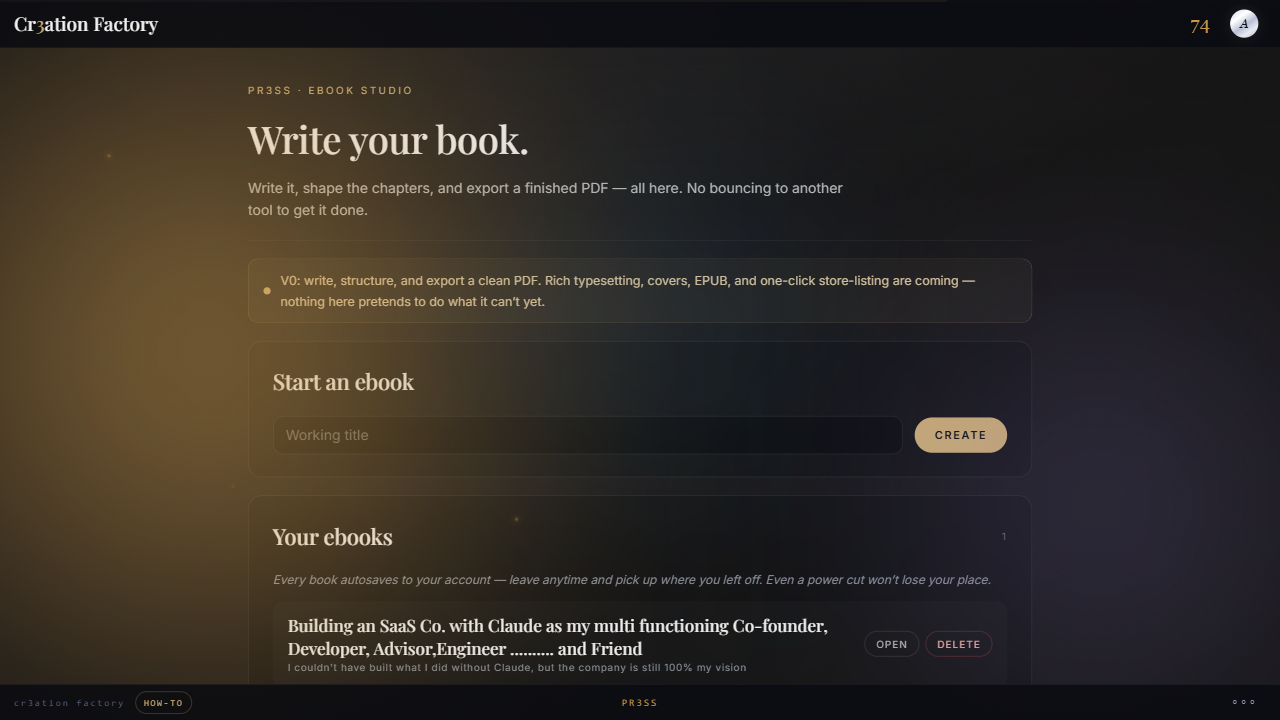
Start an ebook
Under Start an ebook, type a Working title and click Create. Your ebook opens.
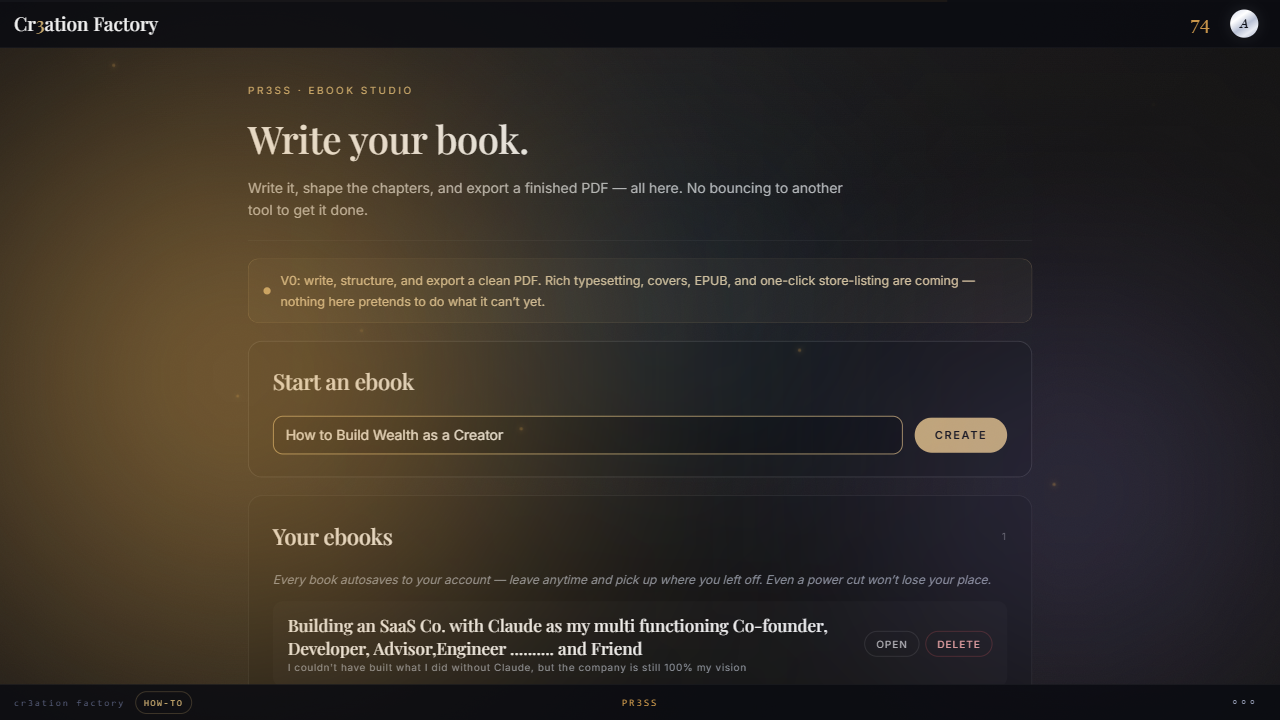
Set the cover & details
In Cover & details, fill in Title, Author name, Subtitle, and Description (for your store listing). Click Save details.

Draft an outline with AI
In AI assist, enter a Topic or book concept, pick a Genre / style and Target words per chapter, then click Generate outline →. Chapters are added for you.
Write with you, not for you — you edit every word before export.

Shape your chapters
In Chapters, click + Add chapter to add more, the ↑ / ↓ arrows to reorder, and Del to remove one.

Write each chapter
Click a chapter to open it. Type the title and body — or click Write ✦ to have AI fill the body. Click Save now.

Request a creator check (optional)
In Creator check, click Request a creator check so another creator can vouch this is honest, human-made work.
Optional, and it never blocks your export.

Export your PDF
In Finish & export, click Export PDF only. Your browser saves a print-ready PDF.
If nothing happens, allow pop-ups for this site and export again.

List it for sale
Click Send to my store → to list it as a draft product, then follow the Sell guide.

Design — Sheet mode
Open /design?make=sheet →You walk away with a finished .xlsx or .csv (lead magnet, tracker, pricing table).
Sheet mode is the spreadsheet studio inside Design (Grid folded into Design — one front door, two makers). Build a sheet and export a real .xlsx workbook (styled header, number formats, live formulas) or a plain .csv without bouncing to Google Sheets, Excel, or Airtable — then send it to your store in one click.
Honest limits: The editor shows formulas as text — it doesn’t compute them in-app. On .xlsx export they become REAL formula cells and calculate the moment the file opens in Excel or Google Sheets. Multiple tabs and charts aren’t built — never faked.
Open Design → Sheet
Go to /design and answer What are you making? with Sheet — or jump straight to /design?make=sheet.

Start a sheet
Pick one under Start from a template (formula templates calculate on open in Excel / Google Sheets), or under Or start blank, enter a Working title and click Create.

Add the details
In Details, set the Title and Description (for your store listing), then click Save details.

Generate the sheet with AI
In AI assist, describe What’s the sheet for?, pick a Sheet type and Number of rows, then click Generate sheet →.
The AI builds the whole sheet; you edit it to make it yours.

Edit the grid
In The sheet, use + Column and + Row to build, type into the header and data cells, and × to remove. Click Save sheet when it shows unsaved changes.

Request a creator check (optional)
In Creator check, click Request a creator check. Optional; never blocks export.

Download your file
In Finish & ship, click Download .xlsx → for the real workbook, or Download .csv for a flat file.

Send it to your store
Click Send to my store → — it builds the .xlsx, creates a draft product, and attaches the file (every step reports honestly). Then price + publish on /sell.

Push
Open /push →You walk away with a copy-ready, per-channel social post pack.
Push is the in-CF social studio. Write one master post, draft a tailored variant for each platform you write for, see an honest per-channel character check, connect Telegram/Discord/Bluesky to auto-post on a schedule, and export a finished pack.
Honest limits: Channel-variant drafting covers 11 platforms today — X, LinkedIn, Instagram, Facebook, Threads, TikTok, YouTube, Bluesky, Telegram, Discord, and Reddit: one AI call adapts your master post's exact words/claims to each platform's format and length (never adds hashtags, emoji, or hype you didn't write), and you copy each variant out to post it yourself anywhere Push doesn't auto-post. Auto-post (CF posts it for you at a scheduled time, no copy-paste) is LIVE today for Telegram, Discord, and Bluesky only. LinkedIn, Reddit, X, Instagram, TikTok, Facebook, and YouTube auto-post are gated on real, named blockers, not "coming soon": LinkedIn and Reddit need CF to finish their OAuth connect flow; X needs CF to provision a paid API tier (X retired free write access); Instagram and Facebook need Meta App Review (CF's submission pending); TikTok needs Content Posting API approval; YouTube needs Google OAuth verification for the YouTube Data API (not yet submitted). Under the hood a schedule CAN carry one channel's exact variant text instead of the master post, but the on-screen control to pick a variant when scheduling isn't built yet — today a schedule always posts the master Post-box text. Analytics (impressions/engagements/clicks) are not available yet — Push never shows performance numbers because nothing collects them yet.
Open Push
Go to /push — or launch Push from your toolkit.

Start a post
Under Start a post, enter a Working title and click Create.

Draft with AI
In AI draft, type Your idea / hook, pick a Platform voice and a Tone, then click Draft post →.

Compose your post
In Compose, refine the Post text. The Title is yours — it isn’t posted.

Draft a variant for each channel
In Channel drafts, click each platform chip you’re writing for (11 available: X, LinkedIn, Instagram, Facebook, Threads, TikTok, YouTube, Bluesky, Telegram, Discord, Reddit), then click Draft for my channels →. Each channel gets your post resized and reformatted for that platform — edit any card, then Copy it to post there yourself.
This is format adaptation only — nothing gets added that you didn’t write (no new hashtags, emoji, or hook). One draft call counts as one AI run no matter how many channels are picked.

Pick your channels for the pack
In Channels, click each platform chip you’re writing for. Each shows a live character count (e.g. 240/280); over-limit chips warn you to trim.
These chips are the character check + pack tagging, not auto-posting — connect a real channel to post automatically in the Auto-post section below.

Plan time & media
In Plan, set a Target time and add Media references (a URL or a note). Click Save post, then Mark ready when it’s done.
This target time is just your own planning note — it doesn’t schedule anything by itself. To have CF actually post on a schedule, use the Auto-post panel (next step).

Connect a channel & schedule (auto-post)
In Auto-post, under Connect a channel, pick Telegram, Discord, or Bluesky, then fill in the credential (Telegram: add the CF bot as an admin, then paste the channel @username or ID; Discord: paste a webhook URL from Server Settings → Integrations → Webhooks; Bluesky: enter your handle, e.g. name.bsky.social, and an App Password generated in Bluesky Settings → App Passwords — never your main password), then click Connect channel. Click Send test post to confirm it works. Then under Schedule this post, pick the connected channel and a date/time, and click Schedule.
Telegram, Discord, and Bluesky post for real — CF publishes at the scheduled time and the status flips to "Posted" (or an honest "Failed — reason" if it didn’t go through). LinkedIn and Reddit need CF to finish their OAuth connect flow; X needs CF to provision a paid API tier; Instagram and Facebook need Meta App Review (pending); TikTok needs Content Posting API approval; YouTube needs Google OAuth verification — none of those show a connect button yet, not because anything is broken.

Request a creator check (optional)
In Creator check, click Request a creator check. Optional; never blocks export.

Copy or export the pack
In Finish & export, click Copy text to grab the post, or Export post pack → to download the text + channels + character checks.

List it for sale
When the post is tied to a product, click List on store → and follow the Sell guide.

Cut
Open /cut →You walk away with a finished MP4 (rendered in your browser).
Cut is the in-CF video studio. Capture clips, order and trim them, and render a real MP4 in your browser — Stitch mode combines your clips; Faceless mode builds a complete video from a topic: AI writes the script, CF generates a NATIVE AI VOICEOVER for every section (no outside tool needed), finds stock footage, adds music, and renders the finished MP4.
Honest limits: Rendering is real (FFmpeg in your browser). Faceless voiceover is generated natively by CF (server-side AI voice) — a creator never needs ElevenLabs or any outside voiceover tool. The full Faceless video build (voiceover + stock footage) is included with paid plans; free accounts can draft up to 3 AI scripts a day to try it. Raw recorded/imported clips live in this session only — download them to keep them; they are never uploaded. Finished renders auto-save to the project for paid members (last 10 kept); free renders are download-to-keep. Cut does not host or publish.
Open Cut
Go to /cut — or launch Cut from your toolkit.

Start a video
Under Start a video, enter a Working title and click Create.

Capture footage
In Capture, click ● Record camera or ● Record screen (allow the browser permission), or Import file. Click ■ Stop recording to finish.
Clips live in this session — download them to keep them.

Order & trim your clips
In Clips & edit order, rename a clip, reorder with ↑ / ↓, and set Trim in (s) / Trim out (s). Add a Note per clip.
Trim points are applied when you render.

Add the details
In Details, set the Title and a Description / brief, then click Save project.

Render the video
In Render video, pick a tab. Stitch: combine your clips — click Render MP4 →. Faceless: enter a Topic / brief, Style, Duration, Tone, click 1. Generate script, review it, then 2. Render video → — CF generates the AI voiceover for every section and finds stock footage automatically during the render (native, no outside voiceover tool). Watch the progress bar.
The full Faceless build (voiceover + footage) is included with paid plans; free accounts draft scripts.

Download the MP4
When the render finishes, the video previews — click Download MP4 →. On a paid plan the finished render also auto-saves to your project (Saved renders panel, last 10 kept).
Creator check + edit sheet (optional)
Request a creator check, or in Finish & export click Export edit sheet → to hand an editor your plan.

List it for sale
In Ship it, click List on my store → to list your rendered video (or edit sheet) as a draft product, then follow the Sell guide.

You walk away with a CF-hosted website at /s/your-name.
Site is the CF website builder. Answer a branching brief, generate a site shaped to your answers, edit every part, read a real SEO report, and publish to a CF-hosted page.
Honest limits: V0 builds websites (apps are later). The SEO score is computed from your live content, not invented; no traffic numbers are shown until real visitors arrive. Custom domains and live stats are coming and aren’t faked. Members build free; non-members see proposed pricing — nobody is charged until Truth Payments.
Open the builder
Go to /sitebuilder — or launch Site from your toolkit.

Start a site
Under Start a site, enter a Working title and click Create.

Answer the brief
In Tell the builder what you want, answer the intake questions (required ones are marked *). The more specific you are, the less generic the result.

Generate your site
Click Generate my site →. The builder shapes a site to your answers — never a template.
Members: included free. Non-members see proposed pricing and aren’t charged yet.

Tune brand & theme
In Brand & theme, edit the Site name, Tagline, the palette swatches, and the Heading font / Body font.

Edit every page
For each Page, edit the SEO title and Meta description, then each section’s eyebrow, heading, subheading, body, button, and items.

Check your SEO
Read the SEO report score and the per-check rows. Fix anything marked warn or fail.

Save & publish
In Save & publish, set your Public address (/s/your-name), click Save edits, then Publish →. Use View live → to see it.

Sell from your site
Point your site’s buttons at your storefront, and list your products with the Sell guide.

Sell
Open /sell →You walk away with a live storefront with products listed and payouts connected.
The Sell dashboard is where every product you make goes to market. Set up your store, connect payouts, and list products. This is the final step for all five studios.
Honest limits: You can fully prepare your storefront and products now. Checkout and payouts go live with Truth Payments — until then the earnings panel shows an honest zero, never a fake sale.
Open your store dashboard
Go to /sell (or click List on store → from any studio).

Set up your storefront
In Storefront, set your Store handle (this becomes cr3ationfactory.com/store/your-handle), your Store name, and an optional Tagline. Click Create store.

Publish your store
Click Publish store. When it’s live, use View public store → to see it.

Connect payouts
In Payouts, click Set up payouts and complete the Stripe verification.
Stripe handles verification; CF never holds or touches your funds. Checkout goes live with Truth Payments.

Add a product
In New product, pick a Type, set a Price (USD) (0 = free), a Title, a Description, and a Status (draft / published / unlisted). Click Add product.

Manage your products
In Products, click Edit to change a listing or Delete to remove it.

Watch your earnings
The Earnings panel shows your split to the cent once a sale settles.
Honest zero until Truth Payments lands — nothing is shown until it’s real.
